- Đăng vào
Thiết lập SSO cho ArgoCD sử dụng Azure AD
Lần trước mình đã giới thiệu cách deploy ArgoCD trên Kubernetes. Trong bài viết này mình sẽ hướng dẫn thiết lập SSO trên ArgoCD dùng Azure AD.
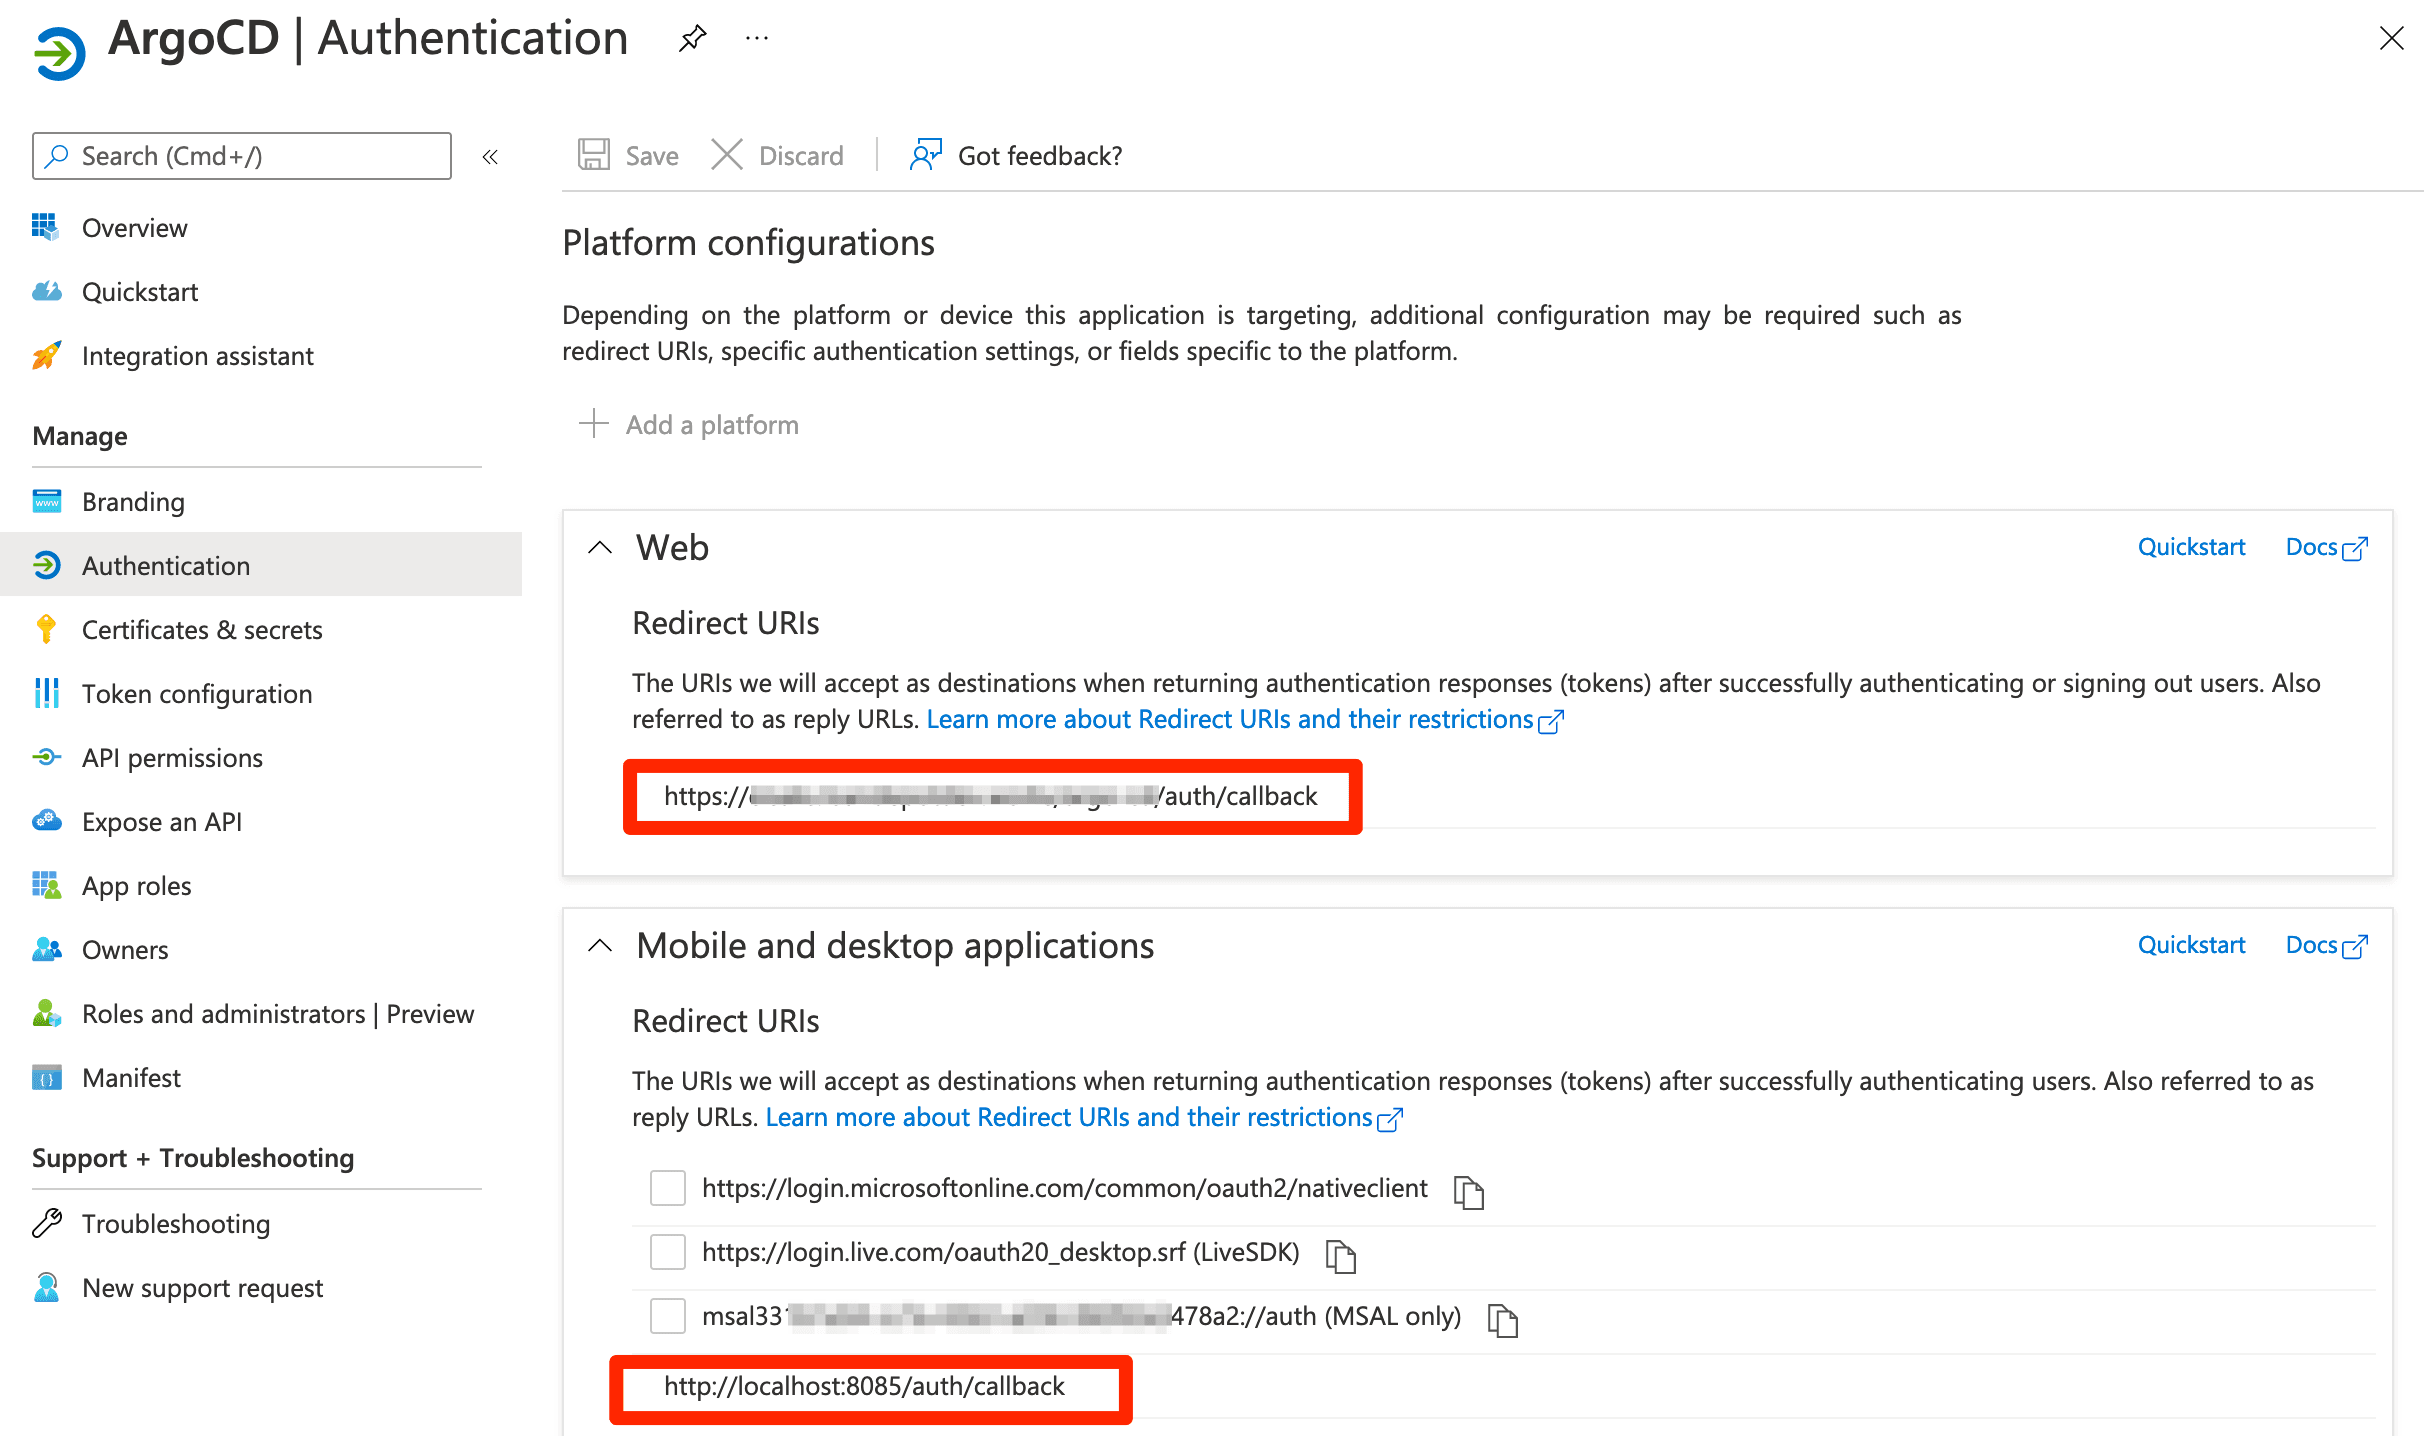
Bước đầu tiên, bạn phải đăng ký 1 app trên Azure AD, các bước tiến hành mình đã trình bày trong bài viết Thiết lập Jenkins SSO dùng Azure AD, hoặc bạn có thể làm theo bài viết hướng dẫn trên trang tài liệu của ArgoCD Azure AD App Registration Auth using OIDC, dưới đây mình chỉ để lại vài lưu ý chính:
- Trong phần Redirect URI chúng ta thêm:
https://<my-argo-cd-url>/auth/callbackcho Platform:Web - Trong phần Redirect URI chúng ta thêm:
http://localhost:8085/auth/callbackcho Platform:Mobile and desktop applications
Sau khi thực hiện xong, kết quả sẽ như dưới đây:

Tiếp theo, chúng ta cần lưu lại thông tin:
- Client-ID
- Client-Secret: Nếu không lưu secret cũ thì có thể tạo mới
- Tenant-ID
Update ArgoCD manifest
Trong quá trình thiết lập SSO mình gặp 1 sỗ lỗi liên quan đến TLS, nên mình đã cập nhật 1 chút file manifest đó là thêm --insecure trong khi deploy argocd-server. Manifest download tại đây: https://raw.githubusercontent.com/argoproj/argo-cd/stable/manifests/install.yaml
...
apiVersion: apps/v1
kind: Deployment
metadata:
  labels:
    app.kubernetes.io/component: server
    app.kubernetes.io/name: argocd-server
    app.kubernetes.io/part-of: argocd
  name: argocd-server
...
      containers:
      - args:
        - /usr/local/bin/argocd-server
        - --insecure
        env:
...
Tiếp đến trong phần ingress
apiVersion: networking.k8s.io/v1
kind: Ingress
metadata:
  name: argocd-server-ingress
  namespace: argocd
  annotations:
    cert-manager.io/cluster-issuer: letsencrypt-prod
    # nginx.ingress.kubernetes.io/ssl-passthrough: "true"
    nginx.ingress.kubernetes.io/backend-protocol: "HTTP"
spec:
  ingressClassName: nginx
  rules:
  - host: argocd.example.com
    http:
      paths:
      - path: /
        pathType: Prefix
        backend:
          service:
            name: argocd-server
            port:
              name: http
  tls:
  - hosts:
    - argocd.example.com
    secretName: argocd-server-tls # as expected by argocd-server
Bây giờ chúng ta apply lại manifest
kubectl apply -n argocd -f install.yaml
kubectl apply -f ingress.yaml
ArgoCD SSO config
data:
  url: https://argocd.example.com
  oidc.config: |
    name: Azure
    issuer: https://login.microsoftonline.com/<Tenant-ID>/v2.0
    clientID: <Client-ID>
    clientSecret: $oidc.azure.clientSecret
    requestedIDTokenClaims:
      groups:
          essential: true
    requestedScopes:
      - openid
      - profile
      - email
ArgoCD SSO secret
Lưu ý rằng chúng ta cần encode Client-Secret bằng base64
data:
  oidc.azure.clientSecret: <base64-encoded-ClientID-Secret>
ArgoCD SSO RBAC
Dưới đây mình define 1 RBAC control đơn giản: mặc định là readonly, riêng user có email your-email@domain.com sẽ có quyền admin.
data:
  policy.default: role:readonly
  policy.csv: |
    g, your-email@domain.com, role:admin
  scopes: '[groups, email]'
Cách thiết lập chi tiết hơn có thể xem thêm Azure AD App Registration Auth using OIDC
Sau khi tạo xong 3 file ở trên thị chúng ta sẽ patch
kubectl patch -n argocd configmaps argocd-cm --patch-file argocd-sso-config.yaml
kubectl patch -n argocd secrets argocd-secret --patch-file argocd-sso-secret.yaml
kubectl patch -n argocd configmaps argocd-rbac-cm --patch-file argocd-sso-rbac.yaml
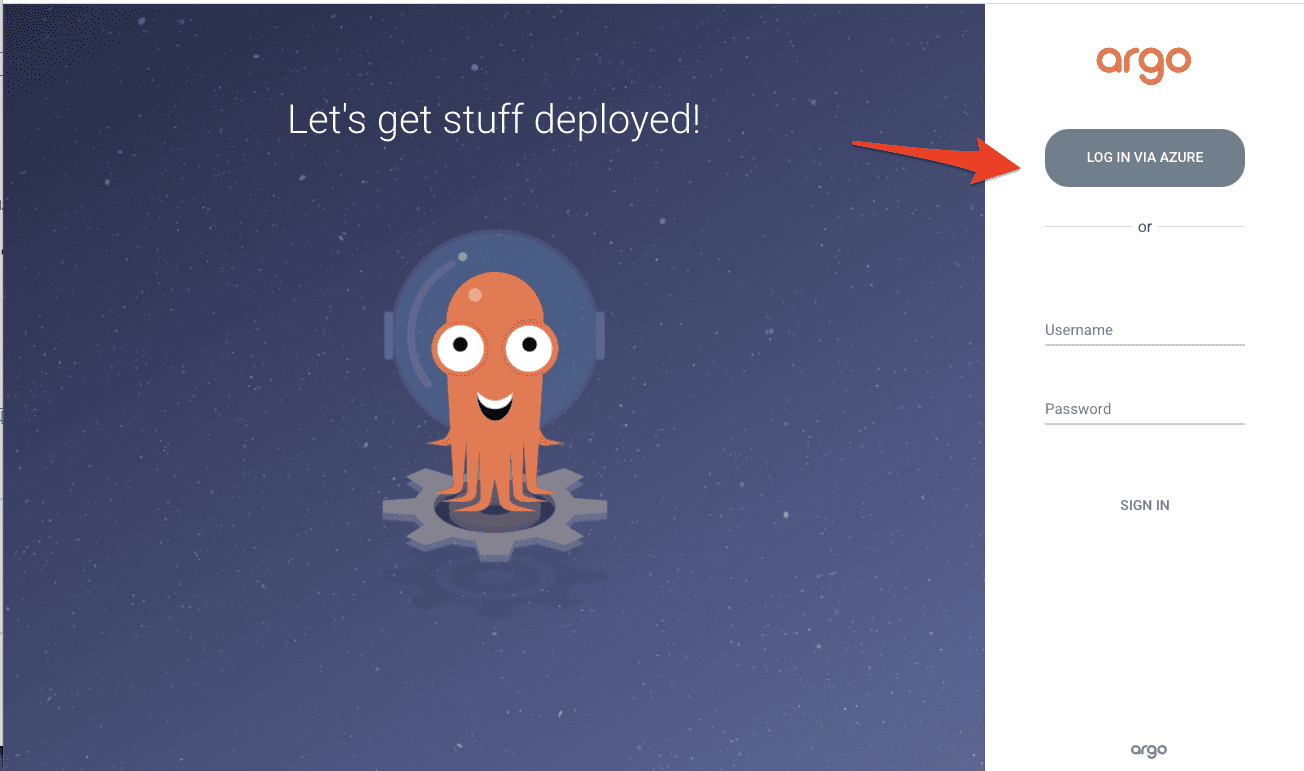
Nếu mọi thứ suôn sẻ, trên màn hình đăng nhập sẽ hiện thêm lự chọn LOG IN VIA AZURE

Sau đó màn hình đăng nhập bằng account Microsoft sẽ hiện ra, sau khi đăng nhập thành công thì bạn có thể vào ArgoCD rồi.
Hy vọng bài viết này sẽ có ích.
Anh Nguyễn,